


One of the best things about the PlayStation 5 is the ability to upgrade its storage. Adding storage to your console makes it so that additional games and applications can be installed without worrying about space. Of course, just because you can change out the storage doesn’t necessarily mean that it’s easy. Fortunately, it’s actually a pretty easy task to do. In fact, I would compare it to how easy it is to change the faceplates. So, without further ado, let’s go over how to update your PlayStation 5 expandable M.2 SSD storage.
How to Update Your PlayStation 5’s Expandable Storage
Once you’ve purchased an appropriate expandable M.2 SSD with a heatsink, you can replace it with the drive that the PlayStation 5 hardware comes with. If you don’t already have one, you can check out this list of SSDs with a heatsink that we personally recommend.
Once that’s out of the way, you still need to grab yourself a Phillips head screwdriver and follow these instructions according to which PS5 model you have to properly install the SSD into your console.
CFI-2000/7000 M.2 SSD Installation Guide
With the console laid out on a towel or other soft surface, face the disc drive toward you so that it is on your left-hand side. With that, follow these instructions:
- Locate the cover that has the triangle stamped on it.
- Using a bit of pressure, pull it to your right.
- With the cover removed, the expansion cover slot will be revealed.
- Using your Phillips head screwdriver, you’ll want to remove the screw securing the cover slot.
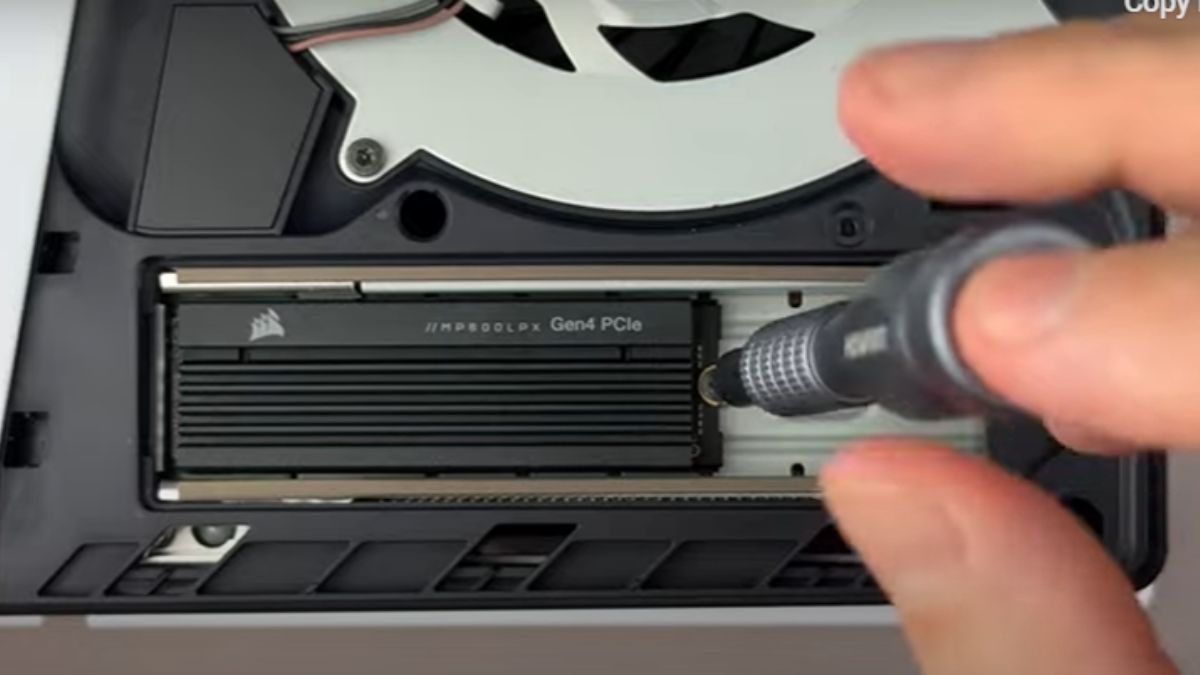
- Slide in your new M.2 SSD into the available slot, careful to mind the circular slots.
- These circular slots are where you will place the metallic spacers that your M.2 SSD came with, which help lock it in place.
- Once installed, close the console the same way you opened it.
You can then turn the PlayStation 5 on so that it may reformat your SSD and render it useful for the console.
CFI-1000 M.2 SSD Installation Guide
For the CFI-1000 models, follow these instructions instead:
- Lay your console down on a soft surface with the disc drive sitting on your right-hand side.
- Place your hand on the left side of the top cover and pull it gently to the left.
- A popping sound will indicate that it is safe to remove the cover.
- With that cover off, you will see the M.2 SSD slot cover on the bottom left.
- Using a Phillips head screwdriver, unscrew the screws and remove the slot cover.
- Slide your SSD into the newly available slot, and be mindful of where you need to place the metallic spacers.
- The spacers help keep the SSD stable in your console after installation.
- Once installed, close up the slot cover and put the cover back on.
Once you fire up your console, you will be asked to reformat your drive to make it compatible with the console. Once completed, you’ll have additional space in your PlayStation 5 to use.


